Recipes
The recipes provide examples of how you can use Blue Dot. Don’t be restricted by these ideas and be sure to have a look at the Blue Dot API as there is more to be discovered.
Button
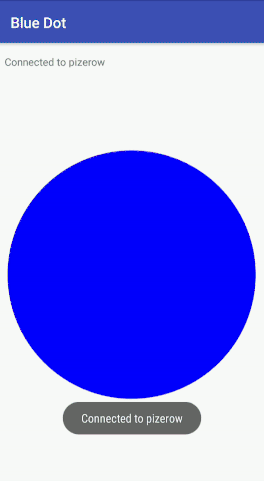
The simplest way to use the Blue Dot is as a wireless button.
Hello World
Let’s say “Hello World” by creating the BlueDot object then waiting
for the Blue Dot app to connect and the button be pressed:
from bluedot import BlueDot
bd = BlueDot()
bd.wait_for_press()
print("Hello World")
Alternatively you can also use when_pressed to call a
function:
from bluedot import BlueDot
from signal import pause

def say_hello():
    print("Hello World")

bd = BlueDot()
bd.when_pressed = say_hello

pause()
wait_for_release and when_released also allow
you to interact when the button is released:
from bluedot import BlueDot
from signal import pause

def say_hello():
    print("Hello World")

def say_goodbye():
    print("goodbye")

bd = BlueDot()
bd.when_pressed = say_hello
bd.when_released = say_goodbye

pause()
Double presses can also be used with wait_for_double_press and
when_double_pressed:
from bluedot import BlueDot
from signal import pause

def shout_hello():
    print("HELLO")

bd = BlueDot()
bd.when_double_pressed = shout_hello

pause()
Flash an LED
Using Blue Dot in combination with gpiozero you can interact with
electronic components, such as LEDs, connected to your Raspberry Pi.
When a button is pressed, the LED connected to GPIO 27 will turn on; when released it will turn off:
import os
from bluedot import BlueDot
from gpiozero import LED

bd = BlueDot()
led = LED(27)

bd.wait_for_press()
led.on()

bd.wait_for_release()
led.off()
You could also use when_pressed and
when_released:
from bluedot import BlueDot
from gpiozero import LED
from signal import pause

bd = BlueDot()
led = LED(27)

bd.when_pressed = led.on
bd.when_released = led.off

pause()
Alternatively use source and
values:
from bluedot import BlueDot
from gpiozero import LED
from signal import pause

bd = BlueDot()
led = LED(27)

led.source = bd.values

pause()
Remote Camera
Using a Raspberry Pi camera module, picamera.PiCamera and
BlueDot, you can really easily create a remote camera:
from bluedot import BlueDot
from picamera import PiCamera
from signal import pause

bd = BlueDot()
cam = PiCamera()

def take_picture():
    cam.capture("pic.jpg")

bd.when_pressed = take_picture

pause()
Joystick
The Blue Dot can also be used as a joystick when the middle, top, bottom, left or right areas of the dot are touched.
D-pad
Using the position the Blue Dot was pressed you can work out whether it was pressed to go up, down, left, right like the D-pad on a joystick:
from bluedot import BlueDot
from signal import pause

def dpad(pos):
    if pos.top:
        print("up")
    elif pos.bottom:
        print("down")
    elif pos.left:
        print("left")
    elif pos.right:
        print("right")
    elif pos.middle:
        print("fire")

bd = BlueDot()
bd.when_pressed = dpad

pause()
At the moment the D-pad only registers when it is pressed. To get it work
when the position is moved you should add the following line above
pause():
bd.when_moved = dpad
Robot
These recipes assume your robot is constructed with a pair of H-bridges. The forward and backward pins for the H-bridge of the left wheel are 17 and 18 respectively, and the forward and backward pins for H-bridge of the right wheel are 22 and 23 respectively.
Using the Blue Dot and gpiozero.Robot, you can create a bluetooth
controlled robot which moves when the dot is pressed and stops when it is
released:
from bluedot import BlueDot
from gpiozero import Robot
from signal import pause

bd = BlueDot()
robot = Robot(left=(17, 18), right=(22, 23))

def move(pos):
    if pos.top:
        robot.forward()
    elif pos.bottom:
        robot.backward()
    elif pos.left:
        robot.left()
    elif pos.right:
        robot.right()

def stop():
    robot.stop()

bd.when_pressed = move
bd.when_moved = move
bd.when_released = stop

pause()
Variable Speed Robot
You can change the robot to use variable speeds, so the further towards the edge you press the Blue Dot, the faster the robot will go.
The distance attribute returns how far from the centre
the Blue Dot was pressed, which can be passed to the robot’s functions to
change its speed:
from bluedot import BlueDot
from gpiozero import Robot
from signal import pause

bd = BlueDot()
robot = Robot(left=(lfpin, lbpin), right=(rfpin, rbpin))

def move(pos):
    if pos.top:
        robot.forward(pos.distance)
    elif pos.bottom:
        robot.backward(pos.distance)
    elif pos.left:
        robot.left(pos.distance)
    elif pos.right:
        robot.right(pos.distance)

def stop():
    robot.stop()

bd.when_pressed = move
bd.when_moved = move
bd.when_released = stop

pause()
Alternatively you can use a generator and yield (x, y) values to the
gpiozero.Robot.source property (courtesy of Ben Nuttall):
from gpiozero import Robot
from bluedot import BlueDot
from signal import pause

def pos_to_values(x, y):
    left = y if x > 0 else y + x
    right = y if x < 0 else y - x
    return (clamped(left), clamped(right))

def clamped(v):
    return max(-1, min(1, v))

def drive():
    while True:
        if bd.is_pressed:
            x, y = bd.position.x, bd.position.y
            yield pos_to_values(x, y)
        else:
            yield (0, 0)

robot = Robot(left=(lfpin, lbpin), right=(rfpin, rbpin))
bd = BlueDot()

robot.source = drive()

pause()
Appearance
The button doesn’t have to be blue or a dot, you can change how it looks, or make it completely invisible.
Colo(u)r
To change the color of the button use the color: property:
from bluedot import BlueDot
bd = BlueDot()
bd.color = "red"
A dictionary of available colors can be obtained from bluedot.COLORS.
The color can also be set using a hex value of #rrggbb or #rrggbbaa value:
bd.color = "#00ff00"
Or a tuple of 3 or 4 integers between 0 and 255 either (red, gree, blue) or (red, green, blue, alpha):
bd.color = (0, 255, 0)
Square
The button can also be made square using the square: property:
from bluedot import BlueDot
bd = BlueDot()
bd.square = True
Layout
You can have as many buttons as you want.
The Buttons need to be in a grid of columns and rows.

By hiding specific buttons and being creative with the button’s appearance you can create very sophisticated layouts for your controllers using Blue Dot.

The Blue Dot android app supports multi touch allowing you to use multiple buttons simultaneously
Note
Currently only the Android client app supports multi buttons.
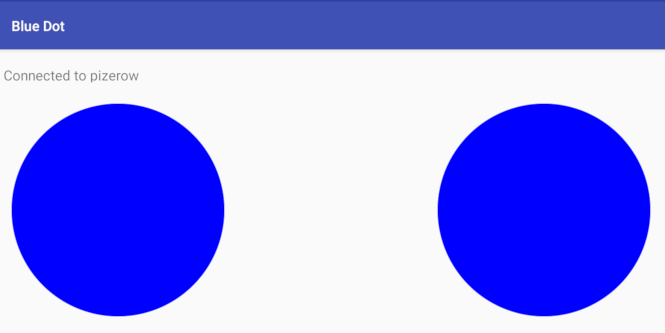
Two Buttons
Create 2 buttons side by side, by setting the number of cols to 2:

from bluedot import BlueDot
from signal import pause

def pressed(pos):
    print("button {}.{} pressed".format(pos.col, pos.row))

bd = BlueDot(cols=2)
bd.when_pressed = pressed

pause()
The buttons could be made verticle by setting the rows attribute:
bd = BlueDot(rows=2)
Each button can be set to call its own function by using the grid position:
from bluedot import BlueDot
from signal import pause

def pressed_1(pos):
    print("button 1 pressed")

def pressed_2(pos):
    print("button 2 pressed")

bd = BlueDot(cols=2, rows=1)

bd[0,0].when_pressed = pressed_1
bd[1,0].when_pressed = pressed_2

pause()
To create a gap in between the buttons you could create a row of 3 buttons and hide the middle button:
from bluedot import BlueDot
from signal import pause

def pressed(pos):
    print("button {}.{} pressed".format(pos.col, pos.row))

bd = BlueDot(cols=3, rows=1)
bd[1,0].visible = False
bd.when_pressed = pressed

pause()
Many Buttons
Create a grid of buttons by setting the cols and rows e.g. 10 buttons in a 2x5 grid:
from bluedot import BlueDot
from signal import pause

def pressed(pos):
    print("button {}.{} pressed".format(pos.col, pos.row))

bd = BlueDot(cols=2, rows=5)
bd.when_pressed = pressed

pause()
You could assign all the buttons random colors:
from bluedot import BlueDot, COLORS
from random import choice
from signal import pause

def pressed(pos):
    print("button {}.{} pressed".format(pos.col, pos.row))

bd = BlueDot(cols=2, rows=5)
bd.when_pressed = pressed

for button in bd.buttons:
    button.color = choice(list(COLORS.values()))

pause()
D-pad
Create a traditional d-pad layout by using a 3x3 grid and hide the buttons at the corners and in the middle:

from bluedot import BlueDot
from signal import pause

def up():
    print("up")

def down():
    print("down")

def left():
    print("left")

def right():
    print("right")

bd = BlueDot(cols=3, rows=3)
bd.color = "gray"
bd.square = True

bd[0,0].visible = False
bd[2,0].visible = False
bd[0,2].visible = False
bd[2,2].visible = False
bd[1,1].visible = False

bd[1,0].when_pressed = up
bd[1,2].when_pressed = down
bd[0,1].when_pressed = left
bd[2,1].when_pressed = right

pause()
Add 2 buttons on the right to create a joypad:
from bluedot import BlueDot
from signal import pause

def up():
    print("up")

def down():
    print("down")

def left():
    print("left")

def right():
    print("right")

bd = BlueDot(cols=3, rows=3)
bd.color = "gray"
bd.square = True

bd[0,0].visible = False
bd[2,0].visible = False
bd[0,2].visible = False
bd[2,2].visible = False
bd[1,1].visible = False

bd[1,0].when_pressed = up
bd[1,2].when_pressed = down
bd[0,1].when_pressed = left
bd[2,1].when_pressed = right

pause()
Slider
By holding down a button and moving the position you can use it as an analogue slider.
Centre Out
Using the BlueDotPosition.distance property which is returned when the
position is moved you can create a slider which goes from the centre out in any
direction:
from bluedot import BlueDot
from signal import pause

def show_percentage(pos):
    percentage = round(pos.distance * 100, 2)
    print("{}%".format(percentage))

bd = BlueDot()
bd.when_moved = show_percentage

pause()
Left to Right
The BlueDotPosition.x property returns a value from -1 (far left) to 1
(far right). Using this value you can create a slider which goes horizontally
through the middle:
from bluedot import BlueDot
from signal import pause

def show_percentage(pos):
    horizontal = ((pos.x + 1) / 2)
    percentage = round(horizontal * 100, 2)
    print("{}%".format(percentage))

bd = BlueDot()
bd.when_moved = show_percentage

pause()
To make a vertical slider you could change the code above to use
BlueDotPosition.y instead.
Dimmer Switch
Using the gpiozero.PWMLED class and BlueDot as a vertical
slider you can create a wireless dimmer switch:
from bluedot import BlueDot
from gpiozero import PWMLED
from signal import pause

def set_brightness(pos):
    brightness = (pos.y + 1) / 2
    led.value = brightness

led = PWMLED(27)
bd = BlueDot()
bd.when_moved = set_brightness

pause()
Swiping
You can interact with the Blue Dot by swiping across it, like you would to move between pages in a mobile app.
Single
Detecting a single swipe is easy using wait_for_swipe:
from bluedot import BlueDot
bd = BlueDot()
bd.wait_for_swipe()
print("Blue Dot swiped")
Alternatively you can also use when_swiped to call a
function:
from bluedot import BlueDot
from signal import pause

def swiped():
    print("Blue Dot swiped")

bd = BlueDot()
bd.when_swiped = swiped

pause()
Direction
You can tell what direction the Blue Dot is swiped by using the
BlueDotSwipe object passed to the function assigned to
when_swiped:
from bluedot import BlueDot
from signal import pause

def swiped(swipe):
    if swipe.up:
        print("up")
    elif swipe.down:
        print("down")
    elif swipe.left:
        print("left")
    elif swipe.right:
        print("right")

bd = BlueDot()
bd.when_swiped = swiped

pause()
Speed, Angle, and Distance
BlueDotSwipe returns more than just the direction. It also includes
the speed of the swipe (in Blue Dot radius per second), the angle, and the
distance between the start and end positions of the swipe:
from bluedot import BlueDot
from signal import pause

def swiped(swipe):
    print("Swiped")
    print("speed={}".format(swipe.speed))
    print("angle={}".format(swipe.angle))
    print("distance={}".format(swipe.distance))

bd = BlueDot()
bd.when_swiped = swiped

pause()
Rotating
You can use Blue Dot like a rotary encoder or “iPod classic click wheel” - rotating around the outer edge of the Blue Dot will cause it to “tick”. The Blue Dot is split into a number of virtual segments (the default is 8), when the position moves from one segment to another, it ticks.
Counter
Using the when_rotated callback you can create a counter which
increments / decrements when the Blue Dot is rotated either clockwise or
anti-clockwise. A BlueDotRotation object is passed to the callback.
Its value property will be -1 if rotated
anti-clockwise and 1 if rotated clockwise:
from bluedot import BlueDot
from signal import pause

count = 0

def rotated(rotation):
    global count
    count += rotation.value

    print("{} {} {}".format(count,
                            rotation.clockwise,
                            rotation.anti_clockwise))

bd = BlueDot()
bd.when_rotated = rotated

pause()
The rotation speed can be modified using the BlueDot.rotation_segments
property which changes the number of segments the Blue Dot is split into:
bd.rotation_segments = 16
Multiple Blue Dot Apps
You can connect multiple Blue Dot clients (apps) to a single server (python program) by using different Bluetooth ports for each app.
Create multiple BlueDot servers using specific ports:
from bluedot import BlueDot
from signal import pause

def bd1_pressed():
    print("BlueDot 1 pressed")

def bd2_pressed():
    print("BlueDot 2 pressed")

bd1 = BlueDot(port = 1)
bd2 = BlueDot(port = 2)

bd1.when_pressed = bd1_pressed
bd2.when_pressed = bd2_pressed

pause()
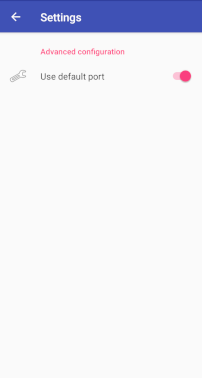
Change the BlueDot app to use the specific port by:
- Opening settings from the menu
- Turning Use default port off
- Selecting the specific Bluetooth port

Bluetooth
You can interact with the Bluetooth adapter using BlueDot.
Pairing
You can put your Raspberry Pi into pairing mode which will allow pairing from other devices for 60 seconds:
from bluedot import BlueDot
from signal import pause

bd = BlueDot()
bd.allow_pairing()

pause()
Or connect up a physical button up to start the pairing (the button is assumed to be wired to GPIO 27):
from bluedot import BlueDot
from gpiozero import Button
from signal import pause

bd = BlueDot()
button = Button(27)

button.when_pressed = bd.allow_pairing

pause()
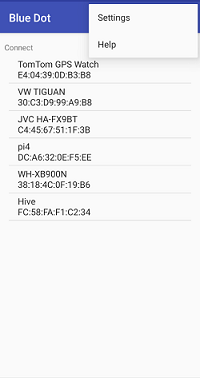
Paired Devices
You can iterate over the devices that your Raspberry Pi is paired too:
from bluedot import BlueDot
bd = BlueDot()

devices = bd.paired_devices
for d in devices:
    device_address = d[0]
    device_name = d[1]
Testing
Blue Dot includes a MockBlueDot class to allow you to test and debug
your program without having to use Bluetooth or a Blue Dot client.
MockBlueDot inherits from BlueDot and is used in the same
way, but you have the option of launching a mock app which you can click with a
mouse or writing scripts to simulate the Blue Dot being used.
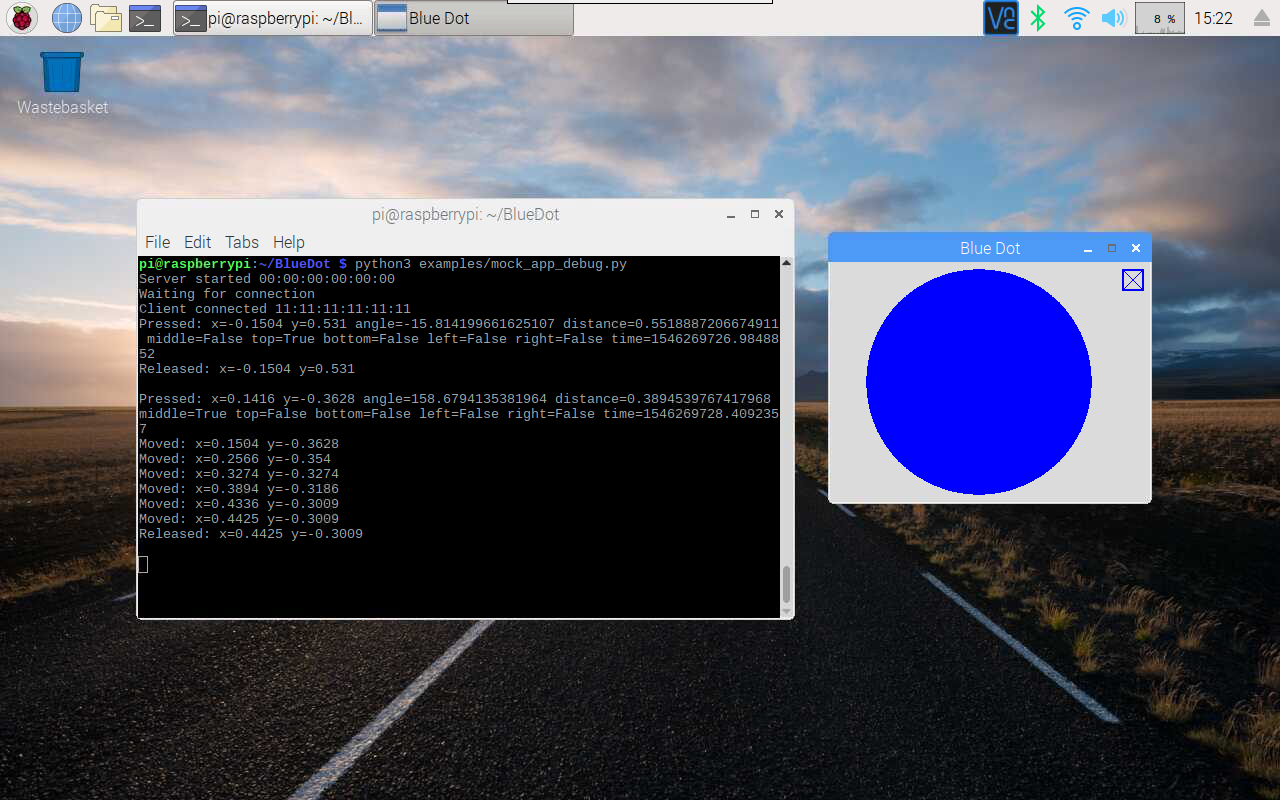
Mock App
Launch the mock Blue Dot app to test by clicking the on-screen dot with the mouse:
from bluedot import MockBlueDot
from signal import pause

def say_hello():
    print("Hello World")

bd = MockBlueDot()
bd.when_pressed = say_hello

bd.launch_mock_app()
pause()
Scripted Tests
Tests can also be scripted using MockBlueDot:
from bluedot import MockBlueDot

def say_hello():
    print("Hello World")

bd = MockBlueDot()
bd.when_pressed = say_hello

bd.mock_client_connected()
bd.mock_blue_dot_pressed(0,0)